New Dataset Builder gets your data prediction ready in minutes
Tommi Holmgren
CPO
April 21, 2021 • 4 min read
Data is at the heart of every machine learning implementation. We at Aito are great fans of the data-centric approach to building ML, promoted by Andrew Ng among others.
Users can add data into Aito even entry-by-entry using the API. Each new data point immediately contributes as training data and enables a blazing-fast loop from data to predictions. However, we have felt this is not enough. There has been a disconnect from the sample dataset to getting that into Aito without a struggle.
Introducing Aito Dataset Builder
Aito Dataset Builder bridges the gap from user's historic data as a file to getting it in to Aito for Evaluations and prediciton tests. The feature has been already in our Console for a while for user testing and preview, but now it has enough features that we feel it is time to release it officially.
In short, the Dataset Builder lets you do the following without writing a single line of code:
- Upload a CSV file to Aito
- Define Aito table name
- Pick the columns to be included in the dataset
- Specifies datatypes and analyzers for each column
- Create Aito schema and upload the data
The following screencast video shows the entire workflow in under a minute. For the true connoisseurs, there is a step by step tutorial below.
Upload your sample file
It all starts from the Console and within your Aito instance. The upload CSV file element has been there before, but everything that happens behind it is new!
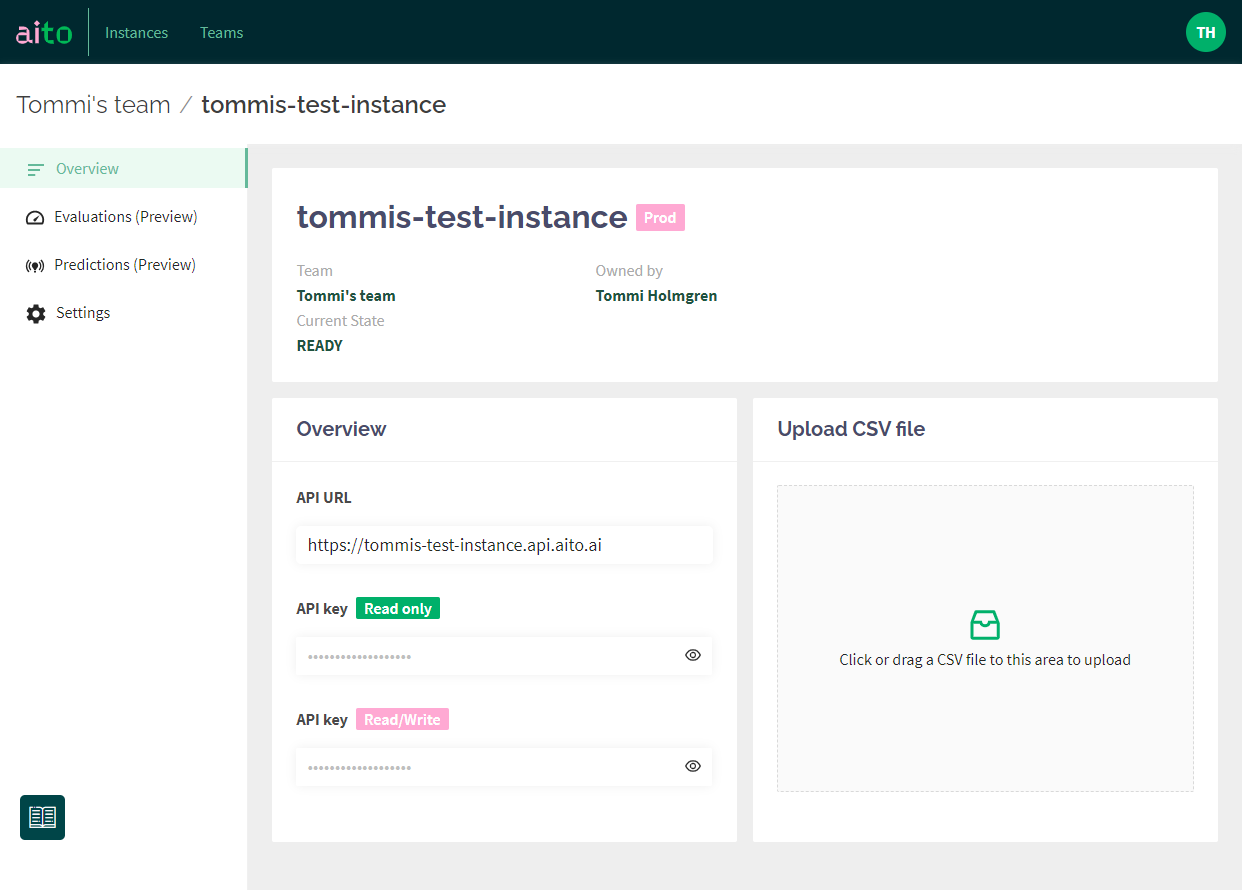
The feature is still on a preview level, meaning that we are finding and fixing issues on the go. Keep that in mind and please report your findings!
Dataset Builder currently supports a variety of CSV files. We plan to add more file types (and maybe even other data connections) at a later stage. Here are some key things to remember with your file:
- One file creates one dataset/table in Aito, and the builder does not support creating linked tables.
- CSV file encoding and delimiter is "automagically" recognized. So essentially, you should not need to worry about it. However, please note that mixing Nordic style decimal numbers with comma as a decimal divider is likely to cause some issues.
- We are still figuring out the size limitations. Our test shows that a 100MB file with a short of million rows and 13 columns was uploaded and processed in about 10 mins.
Once the file selected, it's uploaded to Aito's staging area for processing.
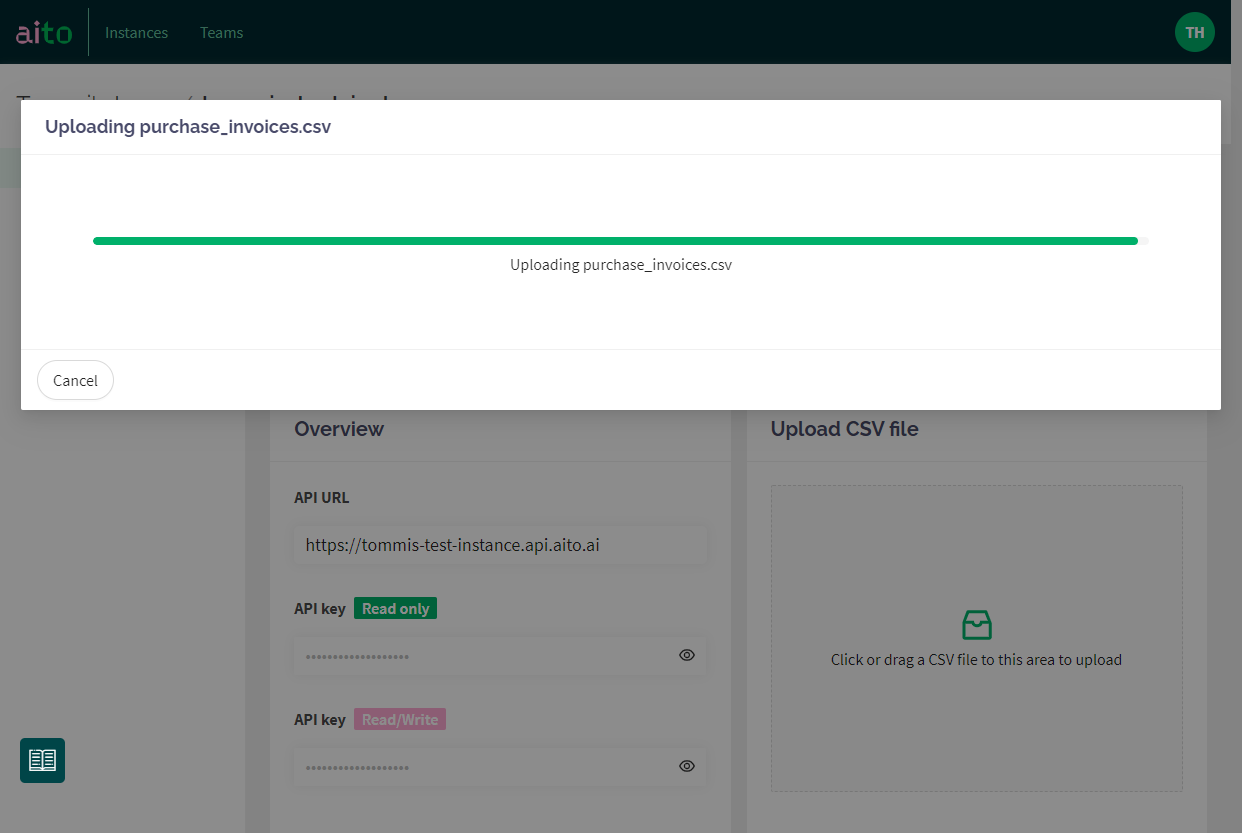
Validate headers and columns
Once the upload process finishes, you'll see a summary of your data. This screen is primarily for validation purposes: "does it look like what I tried to upload?". You'll see all the columns, the total number of them as well as rows. Here, you can also choose whether the first row contains headers or not.
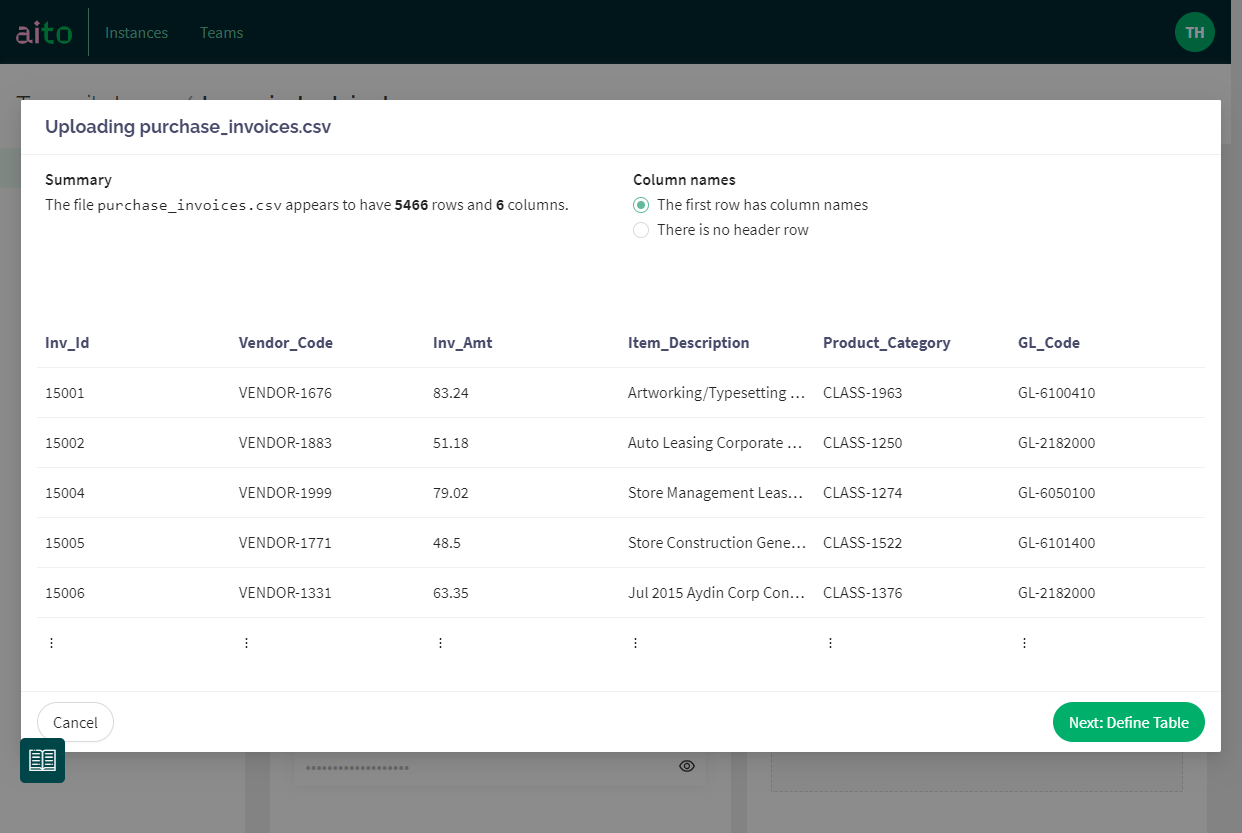
Clicking Next takes you to further column definitions. The real thing!
Choose table name, columns and datatypes
This step is where most of the magic happens. Let's run through your options one by one!
At the top, you can set a name for your dataset. Aito suggests the name of your file as a default. The field has validation for allowed characters.
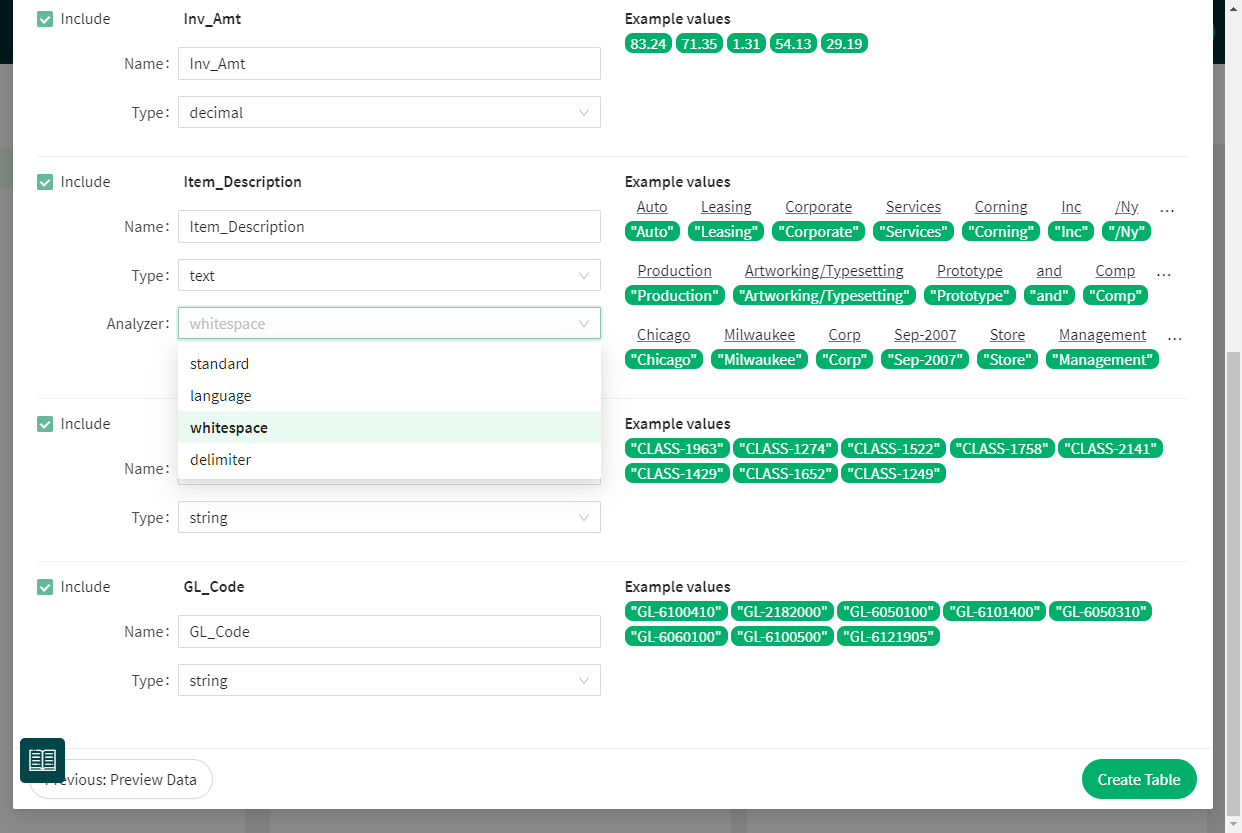
The checkboxes in the front of each column let you choose which rows will be included and ignored in creating the dataset. It's convenient as many times, exports from ERP systems like SAP have loads of data that you don't need for ML predictions. It's an excellent policy to drop them at this stage.
You can also edit the name of each column. By default, they come from the first row of your data.
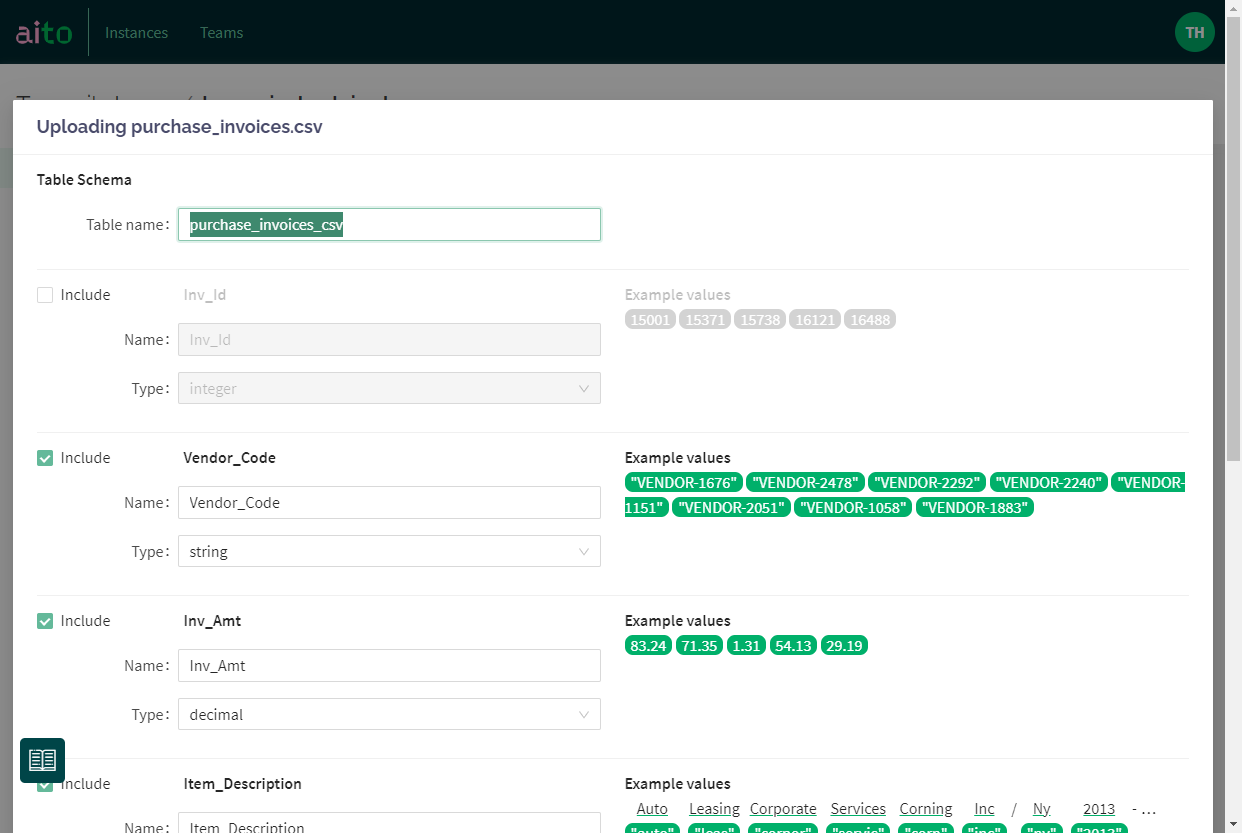
In my experience, the most time goes to making sure the data types are correct in your data and match your purposes for machine learning. This view simplifies the work significantly.
For each column, you'll see a sample of values from your data on the right. Aito automatically pics them so that they represent the variation in your data. It immediately reveals if you have mixed data types in your original file.
You'll be able to choose the desired data type for each column, and Aito takes care of the casting to the right type. For example, in some cases, for ML purposes, you might want to treat Integer as a categorical String (think, for example, labels for the urgency of a support ticket: 1, 2, 3).
Out of currently supported datatypes, Integer, Decimal and Boolean are self-evident, but String vs Text has a significant influence on your predictions.
String in Aito means that the column is treated as a categorical value, and the entire content of the entity is "one". For example, an identifier like GL-2323323 is an excellent example of a string.
Text is something that Aito will apply analyzers on. It means that your original textual content will be treated through chosen analyzers, and converted into features. The example values element on the right side is your guide here. It will show the original text from the cell (black text on white) and how Aito treats it as features (green elements below the text). Choosing the correct type of analyzer is critical for prediction accuracy when working with text. Read more about them here.
Standardanalyzer is a good default, working well in situations where text might contain multiple languages and text that might not be full sentences. Think, for example, line descriptions in invoices.Whitespacebreaks the text into features from each whitespace character but does not remove the most common stopwords or delimiters.Delimiterdoes the same asWhitespacebut lets you choose the delimiterLanguagelets you choose the language in which text is and uses a specific analyzer for each language. A language analyzer should be your go-to option for situations where there is clear full sentence text in one language.
Hit Create to get things going!
Start processing ... and done!
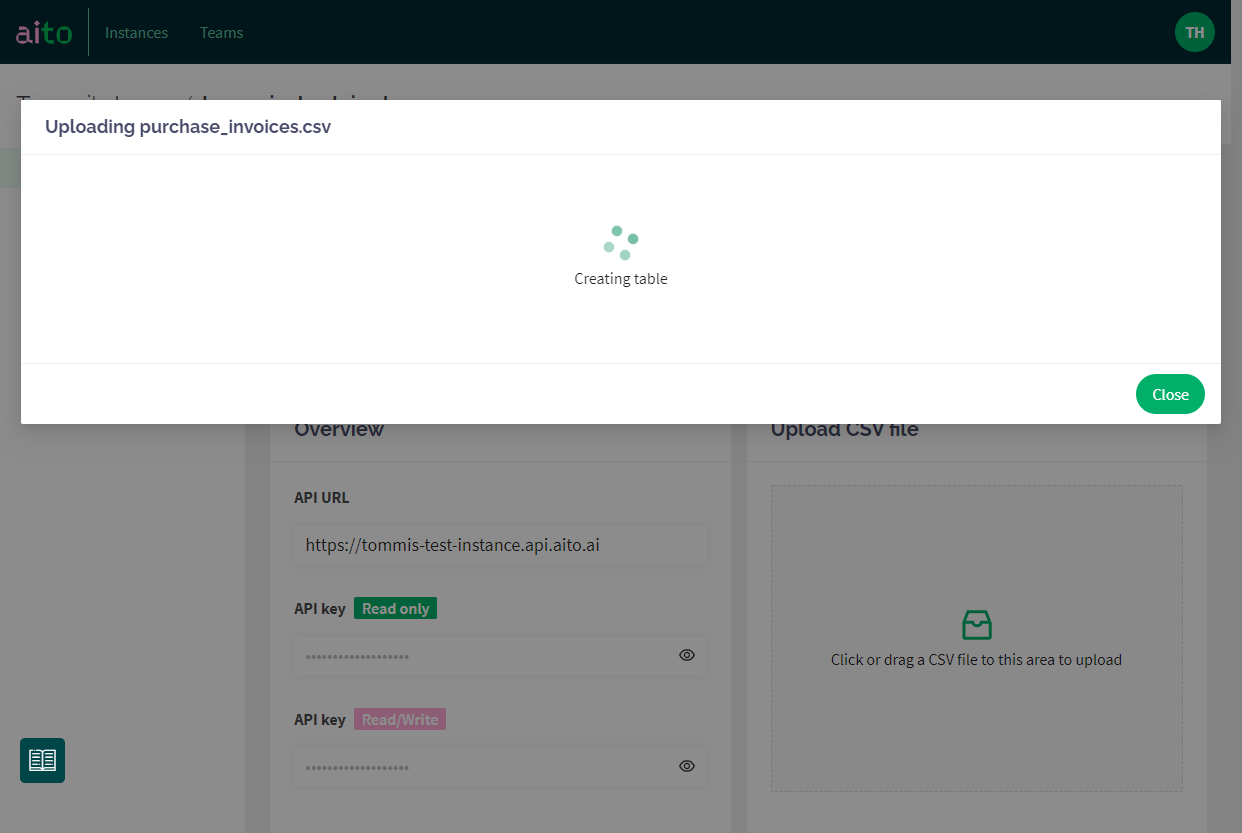
Aito will now create the table with the defined schema and upload all the data from the staging area. You can close the window anytime; the process continues to run in the background.
What's next?
Once your data is in, the next steps would be to create an Evaluation, and maybe try some predictions in the UI!
And, of course, give us feedback. <3
Back to blog listAddress
Episto Oy
Putouskuja 6 a 2
01600 Vantaa
Finland
VAT ID FI34337429